Nana and I walk by 4Cats Arts Studio in Inglewood and constantly daydream about taking time away from our busy work life to lose ourselves in one of these fantastical clay workshops, but our schedules do not tend to line up for us to schedule a class together.
It is a very busy barista season, for me, so I tend to rush through my daily life thoughtlessly, my mind only set on chasing one work task after another. Then, after such an exhausting work day, I just want to hermit in my room, sheltered away from all people.
Unfortunately, this puts distance between my friendships and these important connections fall by the wayside, like lost baggage forgotten in the rush of work stress.
I’m lucky to have the support foundation that I do, and to show the appreciation that I have for my friends for sticking in there, I try to carve out quality time together to rebuild stronger friendships.
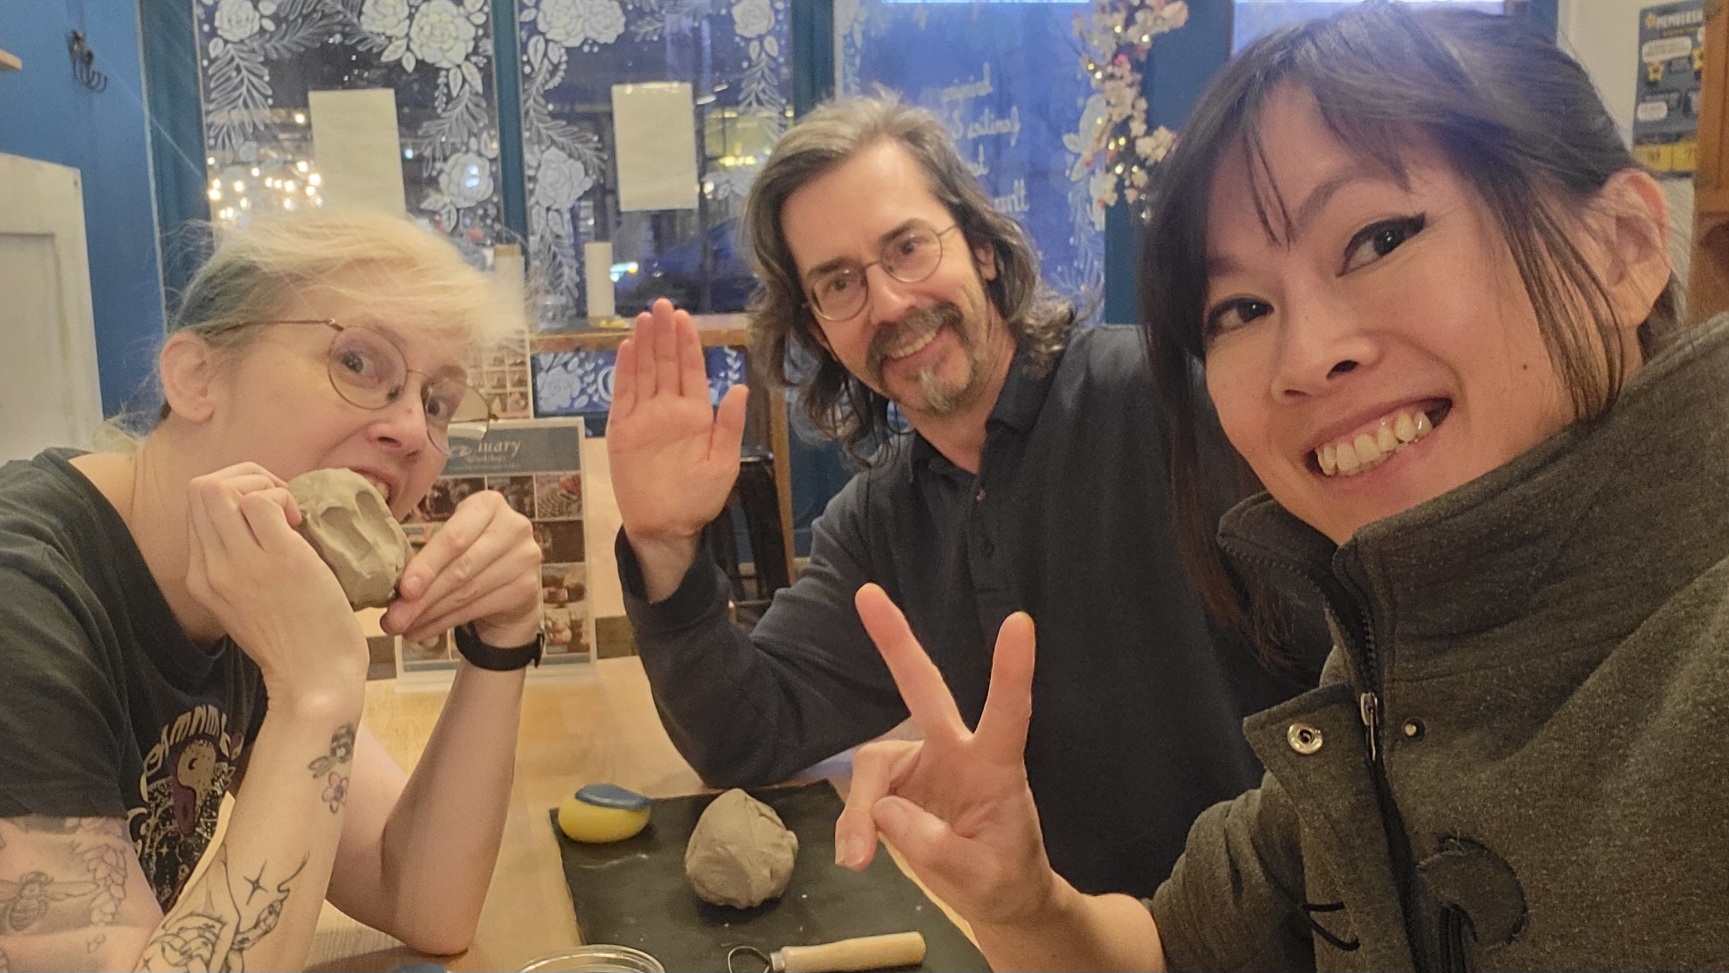
Such is the case for Dazzles. As a thank you gift for his patience and selfless help this year, we presented our dear friend with some quality craft time all together, sitting shoulder to shoulder carving and sculpting our creativity in the comfort of our shared dark humor and mindless nonsense.
Make a Cuppa was a great beginner homeware workshop for us, who have very little experience with making kiln fired clayware. As crafty as we are, Nana, Dazzles, and I shared less than a handful of experiences in making “real pottery”.
The last time I played with clay that was to be kiln fired was in ESC classes – I made a brontosaurus, of course – nearly 40 years ago …
In this class, the initial goal is to create a set of two teacups over the course of about 28 days – one day to sculpt, 14 day wait to return for a glazing session, and then another 14 day wait to return to pick up the finished piece. It’s all about patience.
If you can’t play the waiting game, this workshop isn’t for you.
At the start of the workshop, the instructor walked us through the equipment that was available and how to best work the earth clay to create a cup.
That’s right. ONE CUP. It wasn’t until after re-reading the online description that I realized the initial objective was to make two cups!
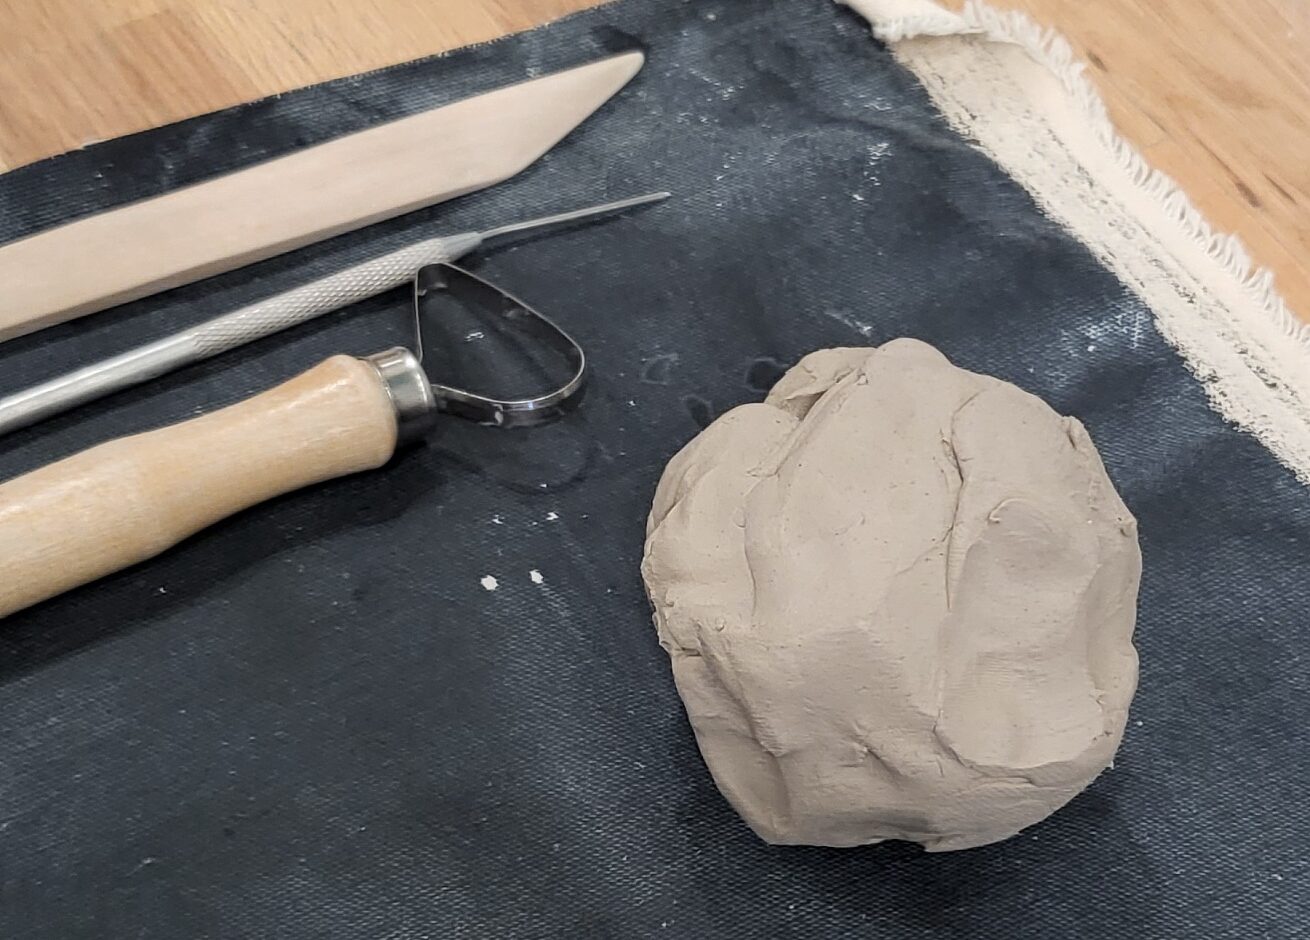
We were given quite a bit of clay – enough to make two traditional sized 4 oz tea cups … or one 10 to 12 oz (pushing it there…) mug. So, of course, we pushed for the “bigger is better” objective – one big cup!
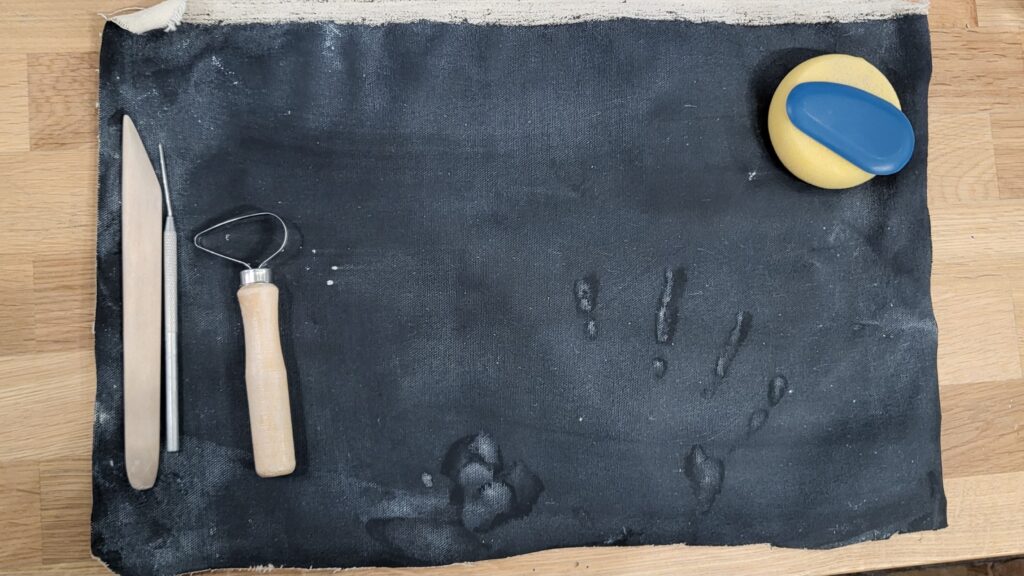
For each of our work stations, we had:
- a ball of earth clay:
- a naturally occurring, fine-grained material used for its high plasticity and porosity,
- trimming tool:
- used to remove excess clay from project,
- potter’s needle:
- used as a reference for thickness
- thickness of walls of project cannot be thinner than the width of this tool
- used for carving smaller details and deep scratching (attaching pieces),
- used as a reference for thickness
- wooden knife
- used for shaping and detail sculpting,
- scraper
- used for smoothing clay surface,
- sponge
- used for smoothing clay surface,
- shared container of water
- used for wetting fingers or sponges to smooth clay surface
- and a shared ball of extra clay in a bag.


The workshop started with a guided 15 minute introduction to the materials and how to start the project. The guide also gave us tips on how to use each tool to smooth out the surface of clay, though she suggested that using our fingers to smooth was the best way.
My friends already had their ideas on what to make, but I didn’t know what I wanted until I sat down with the clay.
Being a Whovian, I wanted a themed cup from the universe of The Doctor. Now, I already have a TARDIS cup and cookie jar.
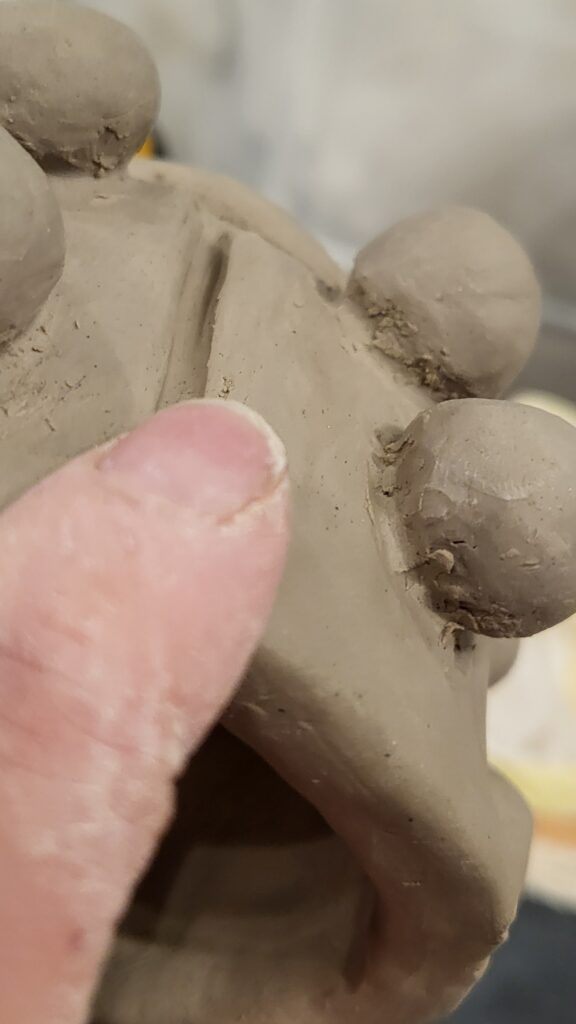
So, as I sat there aggressively compacting my clay ball to squeeze out air bubbles and hidden fissures, it came to me – I was going to make a Dalek cup.
The body of the cup would resemble “pepper pot” shape of the Dalek, but when I lift the cup up to drink, the cup would double as the Dalek eye stalk!
Yes, I know … so geeky!
I found myself enjoying the whole process more than I expected – all giggly and full of smiles. Making the cup was a combination of stress release through aggression and a test of patience over a quick two hour session of good company. Technically, the workshop was scheduled for 90 minutes, but the staff was pretty flexible, and we didn’t feel rushed at all.
I’ve already recommended the workshop to multiple people.
Is my cup worth the $35 + GST that I paid for the workshop?
Probably not – I don’t think anyone would buy my bumpy, unevenly made geeky cup for that price.
The whole experience, however, was more than worthwhile. We found more value in the time spent to learn something new. Guided help was available when needed, and the casual atmosphere was comfortable and accommodating for sharing time with friends.
I would definitely attend another workshop at 4Cats Arts Studio in Inglewood, bring a friend, and recommend it everyone who has patience to wait a while for a finished product.
Now, I’m playing the waiting game – I haven’t registered for my glazing class yet, but I definitely plan on participating in that. Glazing isn’t a requirement and it is additional cost, but glazing is needed to seal in the cup, so you can use it as safe drinkware.
Cost & Time
Building Workshop: $35 + gst per person
Glazing Workshop (optional): $12 + gst
Total Minimum Project Time: 28 days with glazing, 14 days without glazing
Highly Recommended Experience
5 out of 5!
To register: 4Cats Arts Studio in Inglewood